Sunday, January 31, 2016

NUGGET BOOK

Sunday Project #3

I love books and I love Hershey Nuggets, so this is my ideal favour! :)


Supplies:

Cardstock:
Whisper White cut 4" x 3 3/4", and 4 1/8" x 3 7/8", scrap
Pacific Point cut 1/2" x 3 1/4"
Silver Foil scrap

Designer Series Paper:
Shine On Specialty cut 6 5/8" x 3 1/4"
Pacific Point pattern cut 1" x 6" (cut six)

Stamp Set:
Birthday Blooms

Ink: Pacific Point

Adhesives:
Glue Dots
Two-sided tape
Dimensionals

Directions:

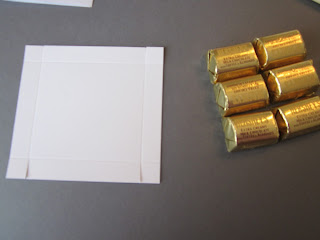
1. Take the smallest piece of cut Whisper White and score 1/2" on all sides. Fold and burnish with bone folder.  Clip to the score line on the short sides.


2. Using Glue Dots or adhesive of your choice, place one on each of the small flaps. Fold to inside of edges to create box.


3. Take the larger piece of Whisper White and score 1/2" on all sides. Create box the same way as before.


4. Place on top of bottom box that holds the nuggets to make sure it fits easily.


5. Cut cover using Shine On Specialty DSP or cardstock of your choice (heavier is better), 6" x 3 1/4". Score at 3" and 3 5/8".


6. Turn cover so that you can see the inside back part, and add three strips of two-sided tape.


7. Set the smaller box holding the nuggets carefully onto the back cover making sure to line up the side of the box with the right hand score line.


8. Put the Whisper White cover on the smaller box and add three strips of two-sided tape.


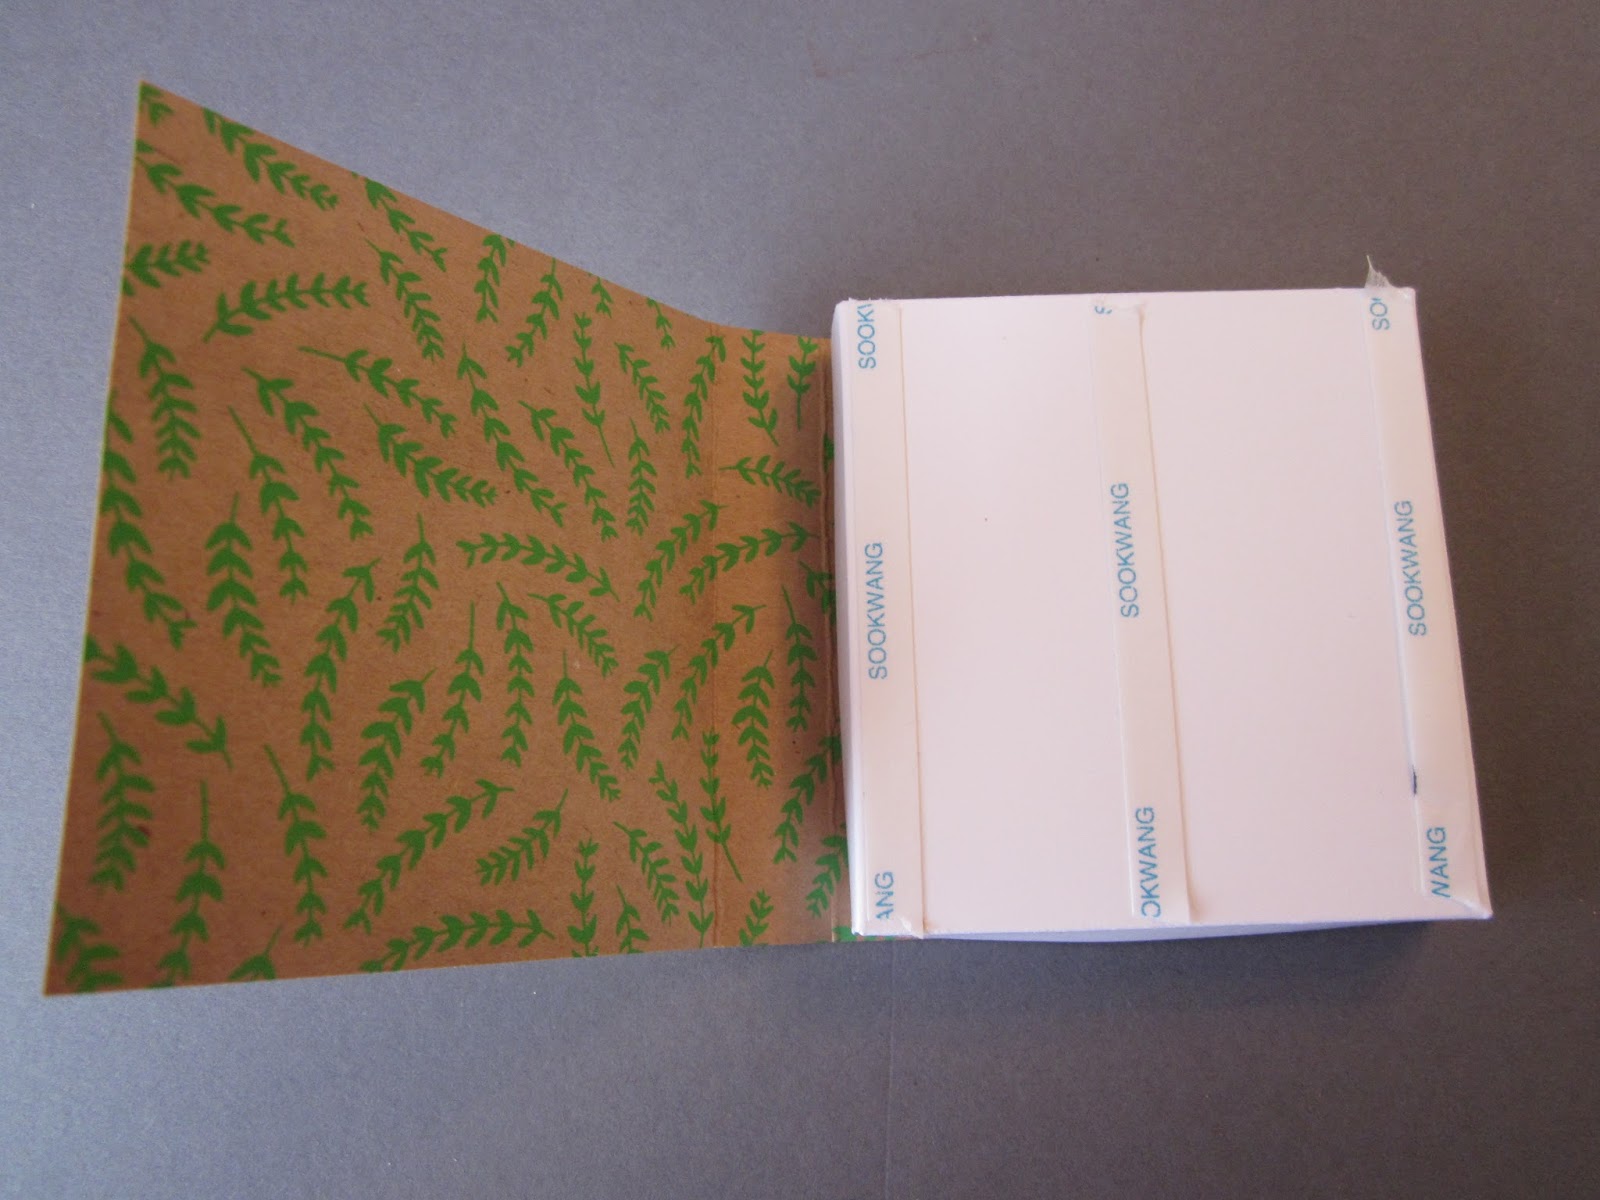
9. Remove paper covers of the tape and close the cover snugly against the side of the box. Burnish the top to secure the connection.

10. Punch out a piece of Silver Foil using the Decorative Label punch.


11. Using the 'for you' sentiment from the Birthday Blooms stamp set and Pacific Point ink, stamp on Whisper White scrap large enough to cut out with the Extra Large Oval punch.

12. Glue the 1/2" x 3 1/4" Pacific Point strip to the left hand side of the front cover.

13. Using dimensionals attach the 'for you' punched sentiment to the centre of the Decorative Label foil image. Using dimensionals attach the finished label to the front of the cover.


14. Wrap the nuggets with the six pieces of 1" x 3" Pacific Point DSP, attach with Glue Dots or Two sided tape.


15. Hope you love this little box as much as I do!!!


WHAT I LOVE

Sunday Project #2

I had such high hopes for this one...

And I used such nasty words...

Have I ever mentioned that two-step stamps and I sometimes don't get along..?

However - I want you to know that the Stampin' Up! notecards are the best deal in our catalogue... You get twenty  3 1/2" x 5" cards, and envelopes for $7.50!!

You can make 5 sets of four cards out of each pack!!!


Supplies:

Cardstock:
Package of Notecards
Melon Mambo cut 3 1/4" x 4 3/4" for each card
Whisper White cut 3" x 4 1/2" for each card

Stamp Set:
What I Love (Sale-a-bration)

Ink:
Melon Mambo
Garden Green/Wild Wasabi
Crushed Curry
Black Memento

Directions:

1. Cut cardstock as directed.

2. Stamp flower outline from 'What I Love' onto post-it note or other thin paper. Cut out. This will be used as a mask.


3. Place the flower mask on your Whisper White sheet in the centre left of the paper (see photo - place the mask where the left hand flower is placed)


4. Stamp a flower outline using Black Memento ink directly onto the mask and cardstock slightly to the right and lower than the mask.


5. Using the filler stamp, and Melon Mambo ink, line up the arrow at the top and stamp onto the flower outline you have previously stamped (leaving the mask in place). Insert swearing if necessary. (This is where I started forgetting to take photos - wouldn't have helped in any case!!)

6. Remove the mask and reposition it over the flower you have just stamped. Using Black Memento Ink, stamp a second flower to the left and higher than the first. (See photo). 

7. Use Melon Mambo - but stamping off once - to stamp the filler image onto the second flower on the left. (see photo) 

8. Place a mask on each flower. Using the longest leaf image and your choice of green ink, stamp leaves around the flowers as shown in the photo.

9. Use the tiny flower image and Crushed Curry ink to stamp flowers around the larger images.

10. Using the 'thank you' sentiment and Memento Black ink, stamp to the left of the main flowers.

11. Glue Whisper White stamped cardstock to Melon Mambo mat. Attach both to the front of the note card.


THE SKY IS THE LIMIT!

Sunday Project #1


Supplies for two Cards:

Cardstock:
Soft Sky cut one 5 1/2" x 8 1/2", cut one 4 1/4" x 11"
Basic Black cut 5 1/4" x 4" (cut two)
Whsiper White cut 5 1/4" x 4" (cut two)
Designer Series Paper:
Perfectly Artistic (Sale-a-bration) cut to 5" x 3 3/4" (cut two - one horizontal, one vertical)

Stamp Set
Sky is the Limit (Sale-a-bration)

Ink:
Black Memento
VersaMark
Basic Black Embossing Powder

Tools & Adhesives
Heat Tool
Snail

Embellishments
Candy Dots (Neutrals - Black)

Directions:

1. Cut cardstock and DSP to measurements


FIRST CARD


2. Score 8 1/2" x 5 1/2" Blue Sky cardstock at 4 1/4".  

3. Rub the DSP with the Embossing Buddy.

4. Using 'The Sky is the Limit' sentiment and VersaMark, stamp on the vertical piece of DSP. Emboss with Basic Black Embossing Powder and Heat Gun.


5. Attach the stamped DSP to the 4" x 5 1/4" Basic Black cardstock with Snail. Attach to front of 
card.

6. Using the 4" x 5 1/4" Whisper White cardstock, stamp 'Congratulations' using the Memento Black Ink. Attach to the inside of the card base.


SECOND CARD


1. Score 4 1/4" x 11" Blue Sky cardstock at 5 1/2" (I like this cut for horizontal cards as they stand easier and do not splay)

3. Rub the horizontal DSP with the Embossing Buddy.

4. Using  the 'Happy Birthday' sentiment and the plane image, stamp with VersaMark, stamp on the horizontal piece of DSP. Emboss with Basic Black Embossing Powder and Heat Gun.


5. Attach embossed DSP to the 4" x 5 1/4" Basic Black mat. (Unless of course you stamped the sentiment crookedly, then you must cut the paper down so that it looks straight - hence my different card...)

6. Add three Basic Black Candy Dots to the bottom right of the DSP (or the cardstock if you had to cut it smaller...)


7. Using the 4" x 5 1/4" Whisper White cardstock, stamp the 'My Friend' sentiment (from Hello stamp set - Sale-a-bration) in Black Memento ink. Stamp clouds with Black Memento ink.


Saturday, January 30, 2016

Going Global!

Saturday Project #4


Supplies:

Cardstock:
Basic Black cut 8 1/2" x 5 1/2" for card base.
Sahara Sand cut 5 1/4" x 4" (cut two)
Delightful Dijon cut 3 1/2" x 3 1/2", scrap for star
Very Vanilla cut 1 1/2" x 2"

Designer Series Paper:
Going Places Stack - 3 different designs

Ink:
Memento Black

Stamp Set:
Going Global

Tools:
Medium Star Punch
Star Framelits (third from centre)
Circle Framelits (fifth and sixth from centre)
1" Circle punch
Banner Triple punch

Directions:

1. Cut Basic Black card base. Cut two pieces of Sahara Sand (5 1/4" x 4). Using one piece run it through the big shot in the Lucky Stars Embossing Folder - this is for the front of the card.

2. Using the star design from the Going Places DSP stack, cut a 2 1/4" circle (fifth from the centre in the Circle framelits). Using the fifth and the sixth circle dies cut a frame from Delightful Dijon by placing the circles one within the other.


 3. Glue the star DSP circle to the card front towards the top as shown in photo. Glue the Delightful Dijon frame around the star DSP.

4. Cut the other two designs of DSP 1 1/2" x 4", and 1" x 2 3/4". Use the Banner Triple punch on one end of each of them.

5. Glue banners to the front of the card as shown in the photo.

5. Stamp the 'Lucky Stars' sentiment in Memento Black ink on Very Vanilla cardstock. Punch out with the 1" Circle Punch.

6. Attach the sentiment to the Delightful Dijon star with Snail.

7. Attach the Delightful Dijon star to the Basic Black star with a dimensional.

8. Attach the whole star/sentiment piece to the front of the card with two dimensionals.


9. Using the second 5 1/4" x 4" piece of Sahara Sand cardstock, stamp the 'you mean the world to me' sentiment in Memento Black ink. Use the big dipper stamp and Delightful Dijon ink pad to decorate the sentiment. Glue to the inside of the card.


Ghiradelli Sketched Dot Bag Favour

Wasn't sure what to call this - is there an official name for it?


Supplies:

Cardstock: 
Whisper White cut 4 1/2" x 4 1/2"
Whisper White scrap for tag
Watercolour Paper

Designer Series Paper: Botanical Gardens

Ink: Old Olive, Daffodil Delight, Tangerine Tango, Chocolate Chip, Basic Black

Tools & Adhesvies:
Aquapen
Two-sided tape, dimensionals, Snail

Embellishments:
Sketched Dots Tag a Bag Gift Bag
Candy Dots (Cajun Craze)

Directions:


1. Score the gift bag lightly at 2 1/4" from the bottom. Fold and glue sides with two-sided tape.


2. Cut the DSP 1 1/4" x 10". Score at 2" and 6 3/4".


3. Stamp the large flower from the Birthday Blooms stamp set using Stazon Black Ink and Watercolour paper.

You can choose whatever colours you wish, I used Daffodil Delight and Tangerine Tango for the flowers, Chocolate Chip for the 'things' on the right, and Old Olive for the leaves.

Once the ink is dry, cut out the design.


4. Using the scraps of Whisper White and Cajun Craze, use the middle die from each of the Tags & Labels (Tags) framelits.


5. Using the sentiment from the Birthday Blossoms stamp set, stamp 'dear friend' in Old Olive on the Whisper White.

Use the smallest flower from the stamp set and stamp it on Daffodil Delight ink, then touch the edges of the stamp on Tangerine Tango ink. Stamp onto the top right of the Whisper White tag.

Place a Candy Dot (Tangerine Tango) in the middle of the flower.

6. Using the 4 1/2" x 4 1/2" Whisper White punch the top two corners with the Curvy Corner Trio Punch (gosh, has that retired?!! Sorry!)

Then stamp the sentiment with Old Olive, and the dots with Tangerine Tango.


7. Wrap the DSP around the centre of the folded up section of the bag, with the ends overlapping in the front. Attach the cut out flower and the tag to the DSP with dimensionals.

Tuck the large Whisper White cardstock in the large pocket in the back, and tuck Ghiradelli Chocolates in the small pocket in the front. (Or a gift card, or cash, or anything else that's flat).


Can you tell the Ghiradelli Chocolates are fussy cut photos of the real thing???

BOTANICAL GARDENS SUITE PROJECT

Oh, how I LOVE this suite!!

Here is our project:


Supplies:

Cardstock:
Rich Razzleberry (or Blackberry Bliss) Cut at 8 1/2" x 5 1/2" for card base.
Rich Razzleberry cut at 5 1/4" x 4"
Rich Razzleberry scrap for flower
Mossy Meadow scraps for ferns
Pink Pirouette cut at 5" x 3 3/4"
Whisper White cut at 5 1/4" x 4" (Cut two)

Stamp Set: Timeless Love

Ink: Rich Razzleberry

Tools: Big Shot, Lots of Labels Framelits, Botanical Builder Framelits

Embellishment: Candy Dot (Rich Razzleberry)

Directions:

1. Using the Whisper White cardstock and the largest die from the Lots of Labels framelits, centre the die in the middle of the cardstock and cut using the big shot. Use the outside frame of paper for completing the project.


2. Using the second largest die from the same set, and the Rich Razzleberry cardstock, centre the die in the middle of the cardstock and cut using the big shot. Use the outside frame of paper to complete the project.

3. Attach the Rich Razzleberry piece underneath the Whisper White piece to form a frame. Centre it carefully, and trim excess Rich Razzleberry that shows around the edges, if any. Glue together using Snail or Tombow.


4. Place the frame over top of the Pink Pirouette cardstock (do not attach), and stamp with the sentiment using Rich Razzleberry ink.


5. If it was stamped a bit crookedly you can adjust the Pink Pirouette to make it straight (ask me how I know?!!). Then attach the Whisper White and Rich Razzleberry frame to the Pink Pirouette cardstock with dimensionals.

6. Cut the flowers and leaves using the Botanical Builders Framelits. Use Mossy Meadow to cut two fern pieces. Use Rich Razzleberry to cut the largest flower. Use Pink Pirouette to cut the small flower.


7. Attach the flowers to the front with Snail or Tombow. Add a Rich Razzleberry Candy Dot to the centre of the Pink Pirouette flower. Attach the completed card front to the cardbase.